Blog 8: Keum-Boo
My second blog for August is on the Korean technique of Keum-Boo – the main subject I had intended to write about in July. As it was a busy month I didn’t quite manage to post it. Whilst writing it, I also realised that it had become too long, so I divided it into three: one on Hallmarking, the second one on Keum-Boo and the third (in September) on gold plating.
Origin
Keum-Boo is an ancient metal work technique which originated in Korea, though the exact beginnings are unclear. Keum-Boo (also spelt Kum-boo or Kum-Bu) literally means ‘attached gold’. This technique is about attaching pure, 24ct gold foil to silver.
So, why am I using this technique? I came across it when trying to find alternatives to gold plating. (Look out for my next blog in September!) In one of my past collections I had various pieces gold/rhodium plated but when I came aware of the environmental impact of gold-plating, I wanted to avoid using this technique and looked for other ways of adding gold patterns to my work.
I came across Keum-Boo online, when researching alternatives and was immediately intrigued and struck by the potential it offered for creating gold patterns (see my Blog 6 where I wrote about my fascination with patterns) and also the way it did not involve hazardous chemicals.
Keum-Boo
What attracted me further to this technique was its simplicity. I like learning new processes, but especially so when they do not involve the necessary purchase of expensive tools and equipment.
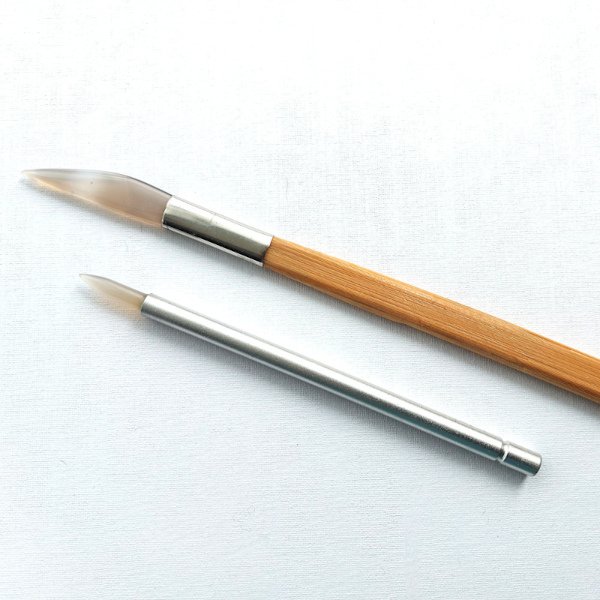
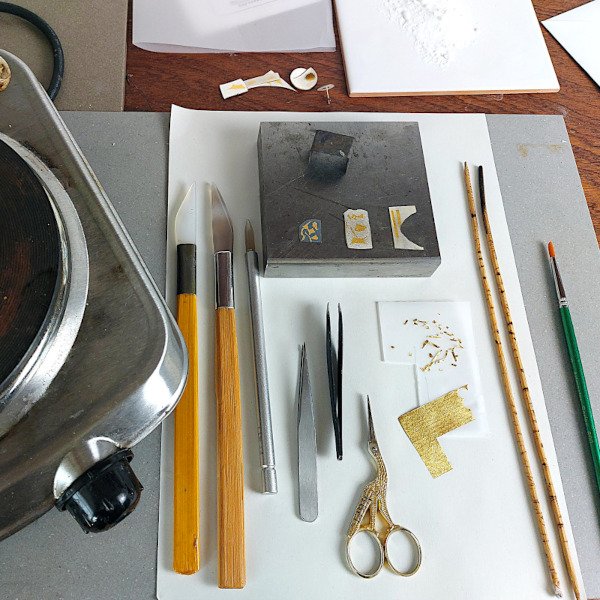
The things I needed for Keum-boo was pure, 24ct gold foil, one of my pieces of sterling silver jewellery, a hot plate, fine scissors, tweezers, baking soda and methylated spirit. The only new tools I needed to buy were two agate burnishers - beautiful objects in themselves (see below).
The gold foil I use for Keum-Boo is 13 microns thick = 0.013 mm. (The thickness is measured in micrometers, or short microns: 1 micron = 0.001 mm.)
Compared to the thicknesses of 0.5-5 microns for gold plating, this gold foil is quite substantial. In actual fact, when I cut my gold foil pieces I always feel I can sense the weight of the gold when it falls onto the table.
The gold foil I buy is recycled and comes from a Japanese company that recycles gold from the dental industry and from electronic scraps.
I have recently also invested in a digital micrometer so that I am able to recycle and roll down my own gold to the correct thickness.
Keum-Boo Process
Keum-Boo is usually the last thing I do on a piece – in other words, all other fabrication steps have been done before. The silver is then prepared to receive the gold. When using sterling silver (as it is an alloy containing copper) it has to be prepared so that a thin layer of fine, pure silver at the surface is created. This allows the fine gold molecules to bond with the silver. When using fine silver, this step is not necessary as the fine silver is pure and does not contain copper.
Once this has been done, the piece is cleaned with baking soda and methylated spirit. I then cut the relevant shape from the gold foil which requires patience and calmness. (Pet cats that jump onto the worktop with the gold foil laid out should be avoided here, as are open windows and sudden gusts of wind. ;)
During the design stage, I would have finalised the exact pattern I want to create and this will guide me when I am cutting the foil.
When all is prepared, the silver piece is placed on the hot plate and the gold is laid on top. Whilst holding the silver piece in place (and this is often the really tricky bit), the gold is burnished (pressed) onto and into the silver with the agate burnisher.
When I am sure all areas of the gold are properly attached, I remove the piece from the hot plate, allow it to cool and add the finishing touches.
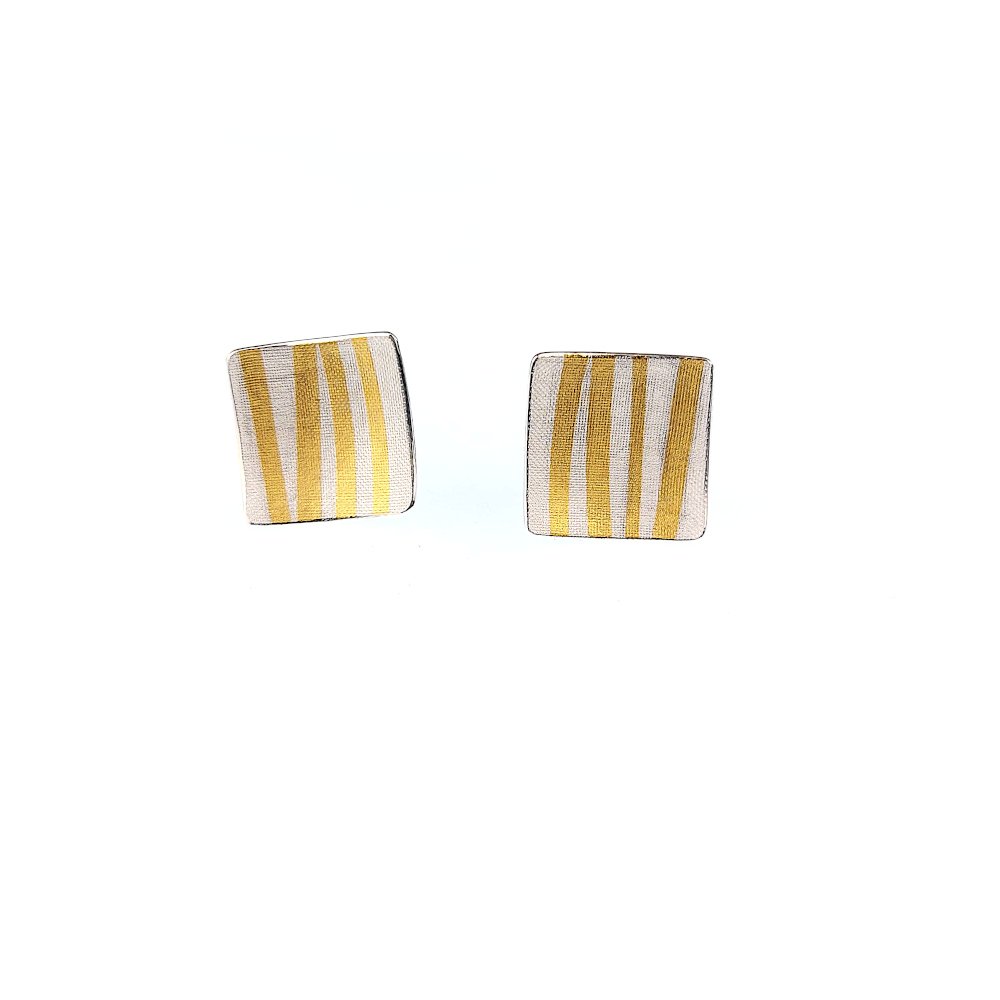
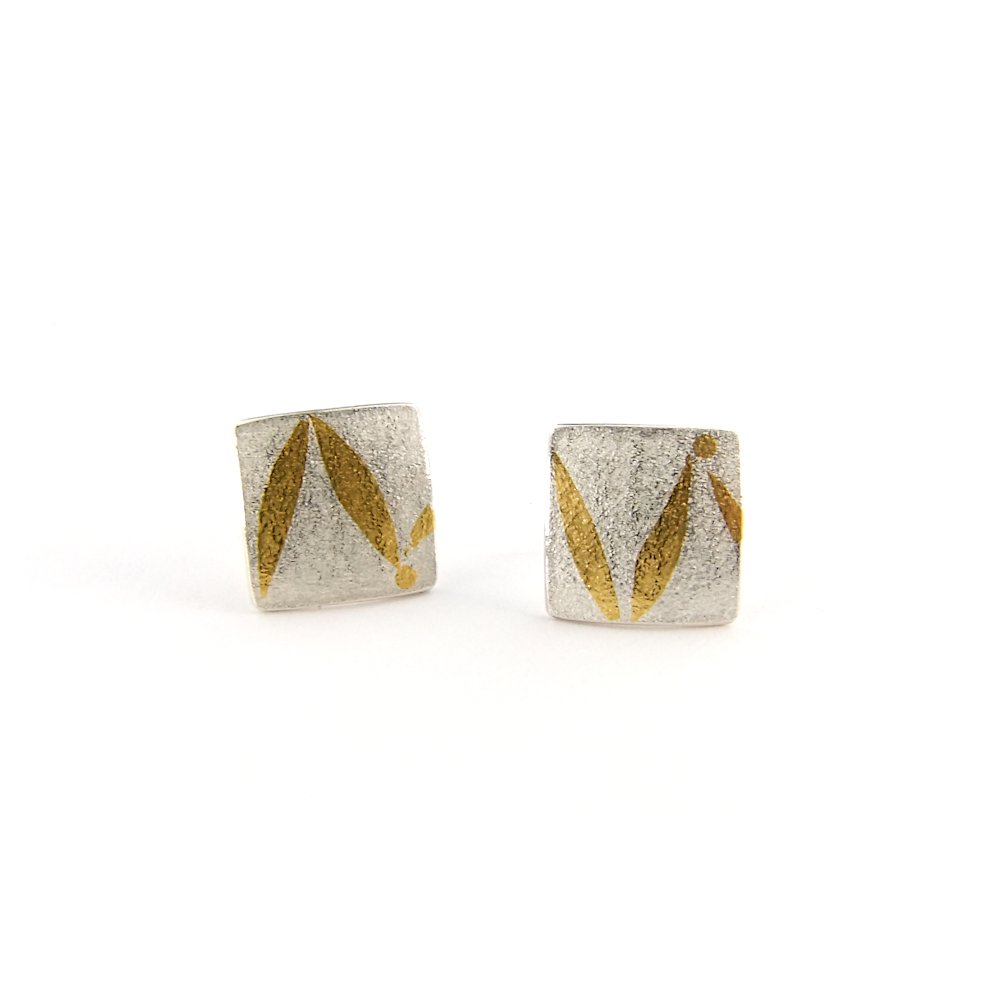
Please note that working over a hot plate involves getting very hot! Therefore, it is most beneficial to do this when one is cold - crouching over a hot plate in the summer and doing a collection of 20 pieces in 30°C is challenging! It is paramount to wear gloves to protect the hands from the heat and ideally a face heat guard to protect the eyes from exposure to heat from the hot plate. The images below show the making process of a pair of square stripy ear studs which are available to buy from my shop.


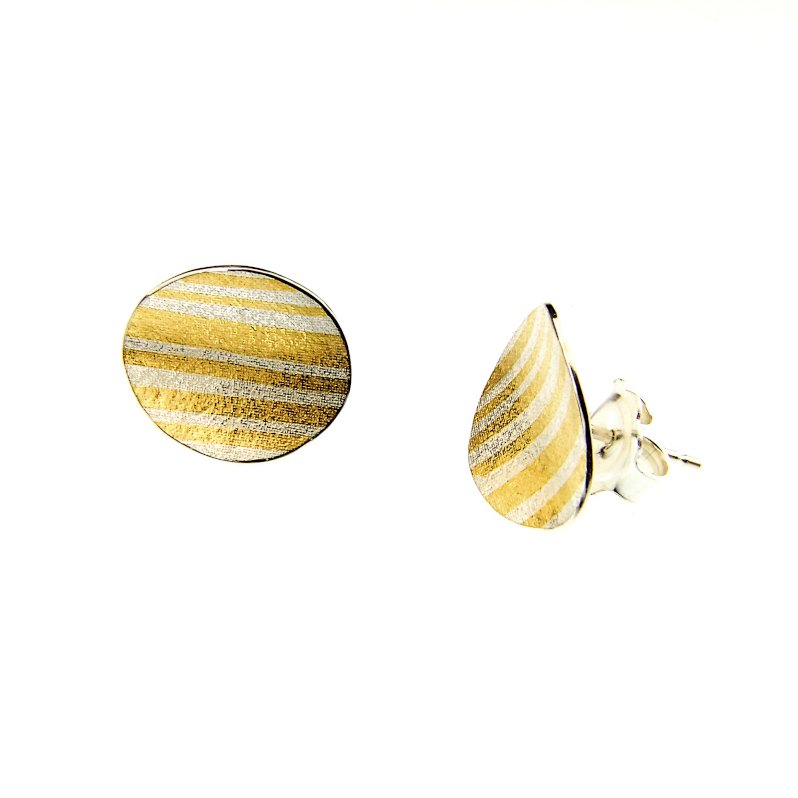
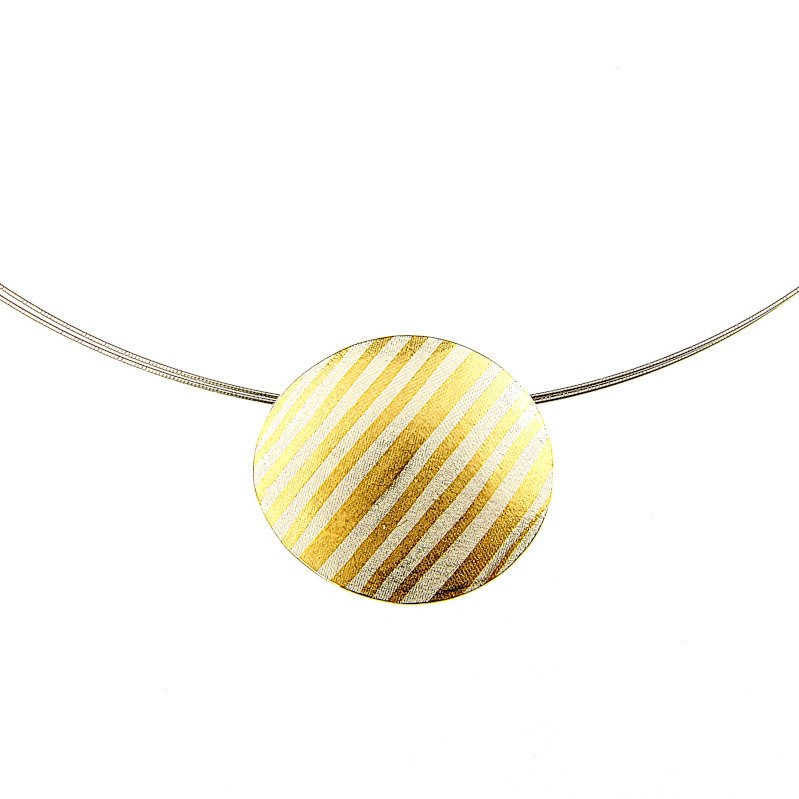
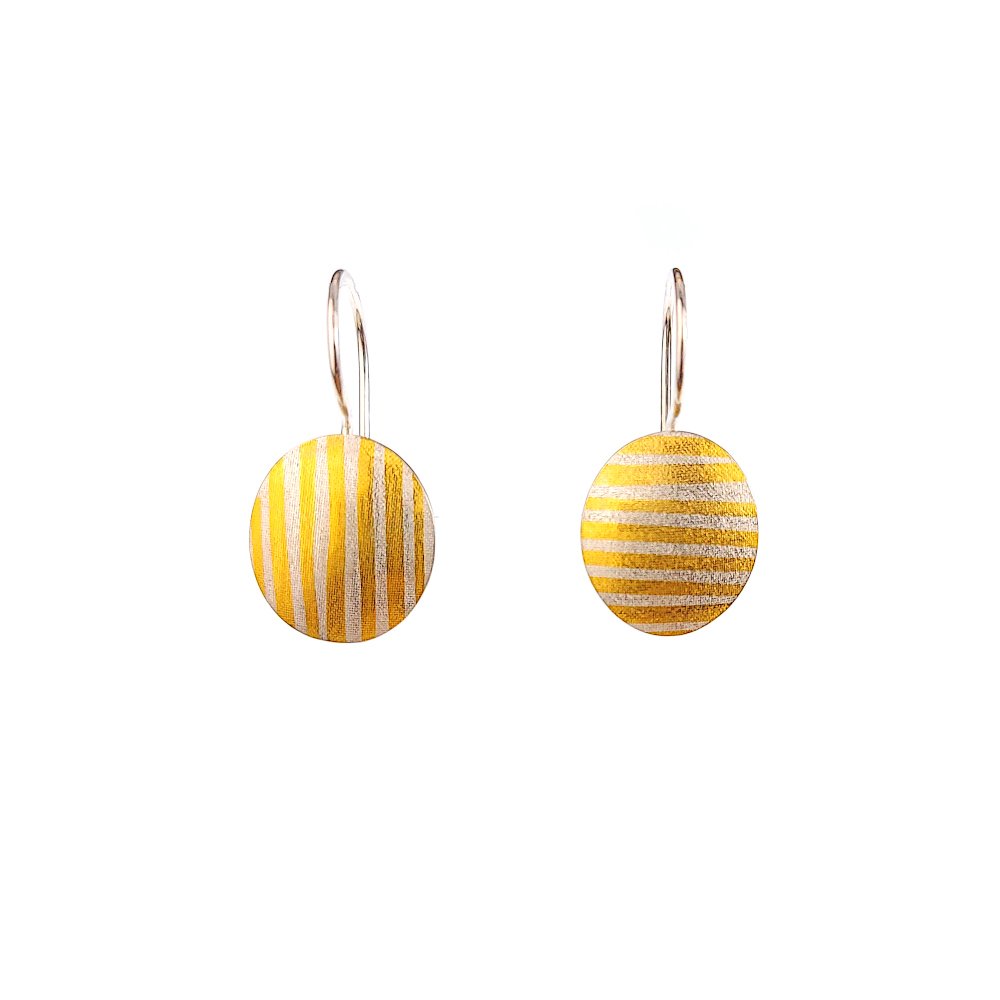
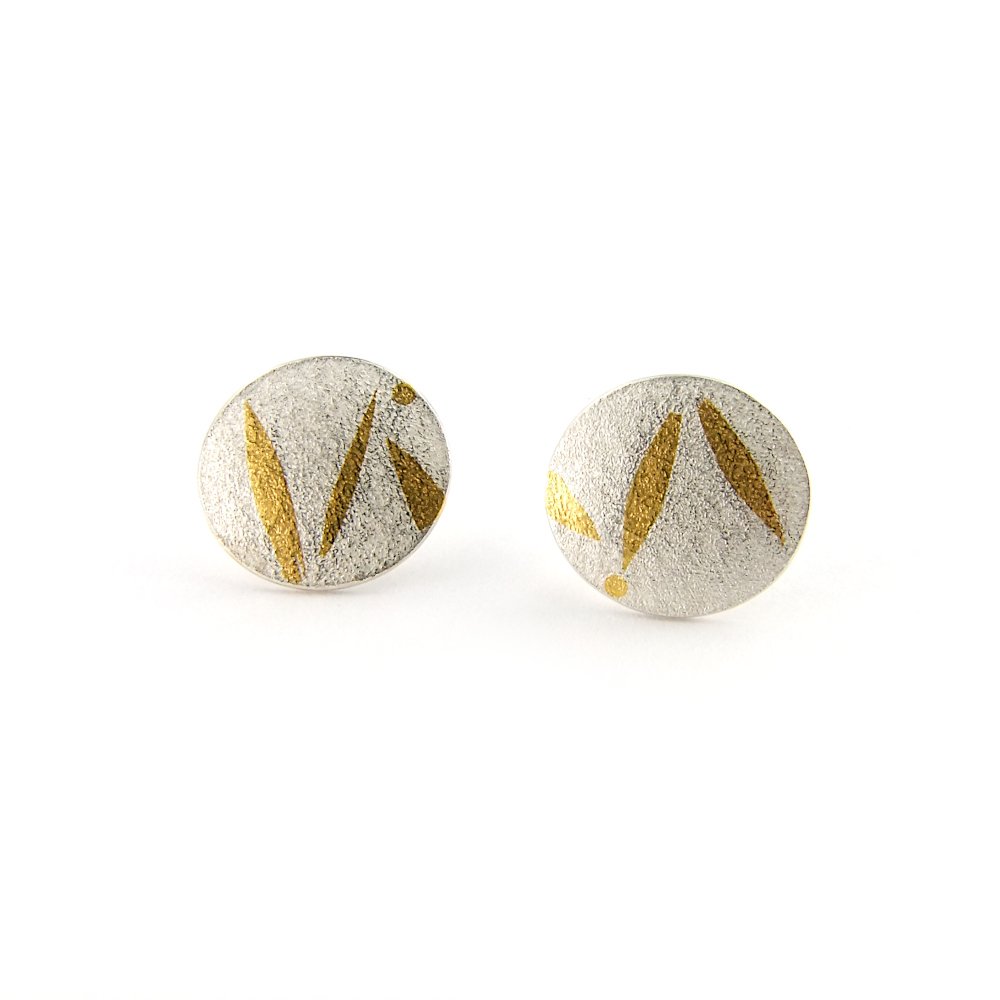
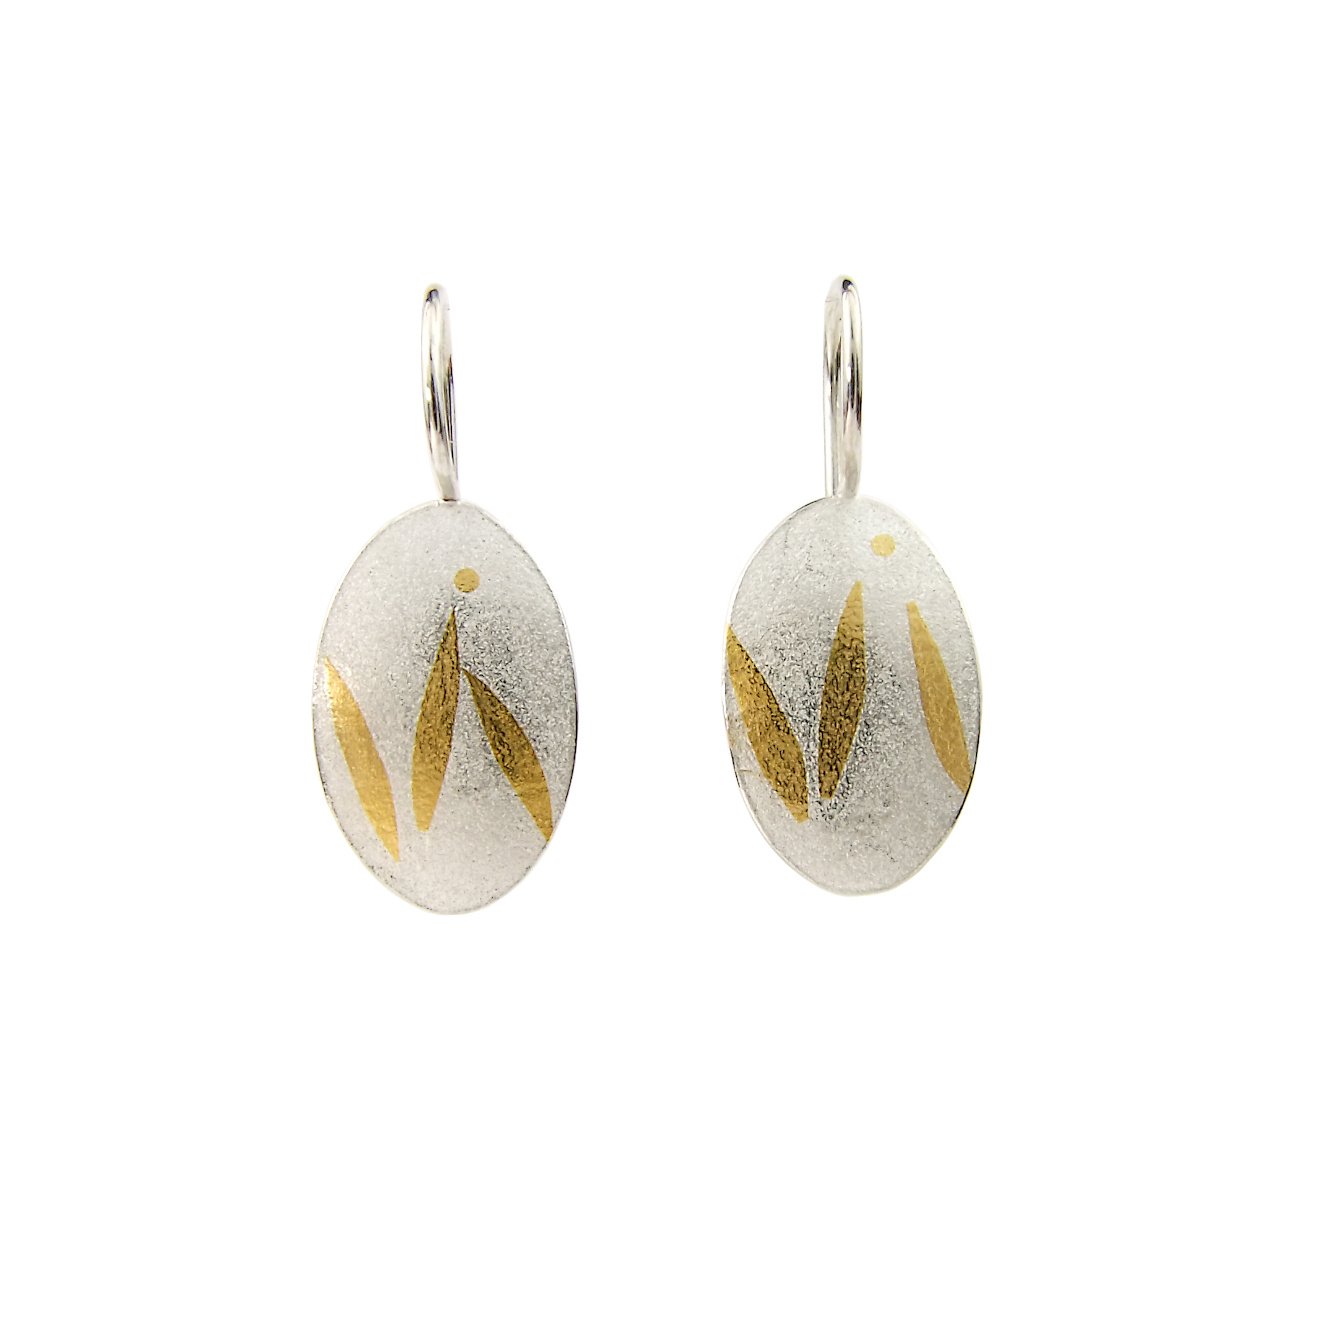
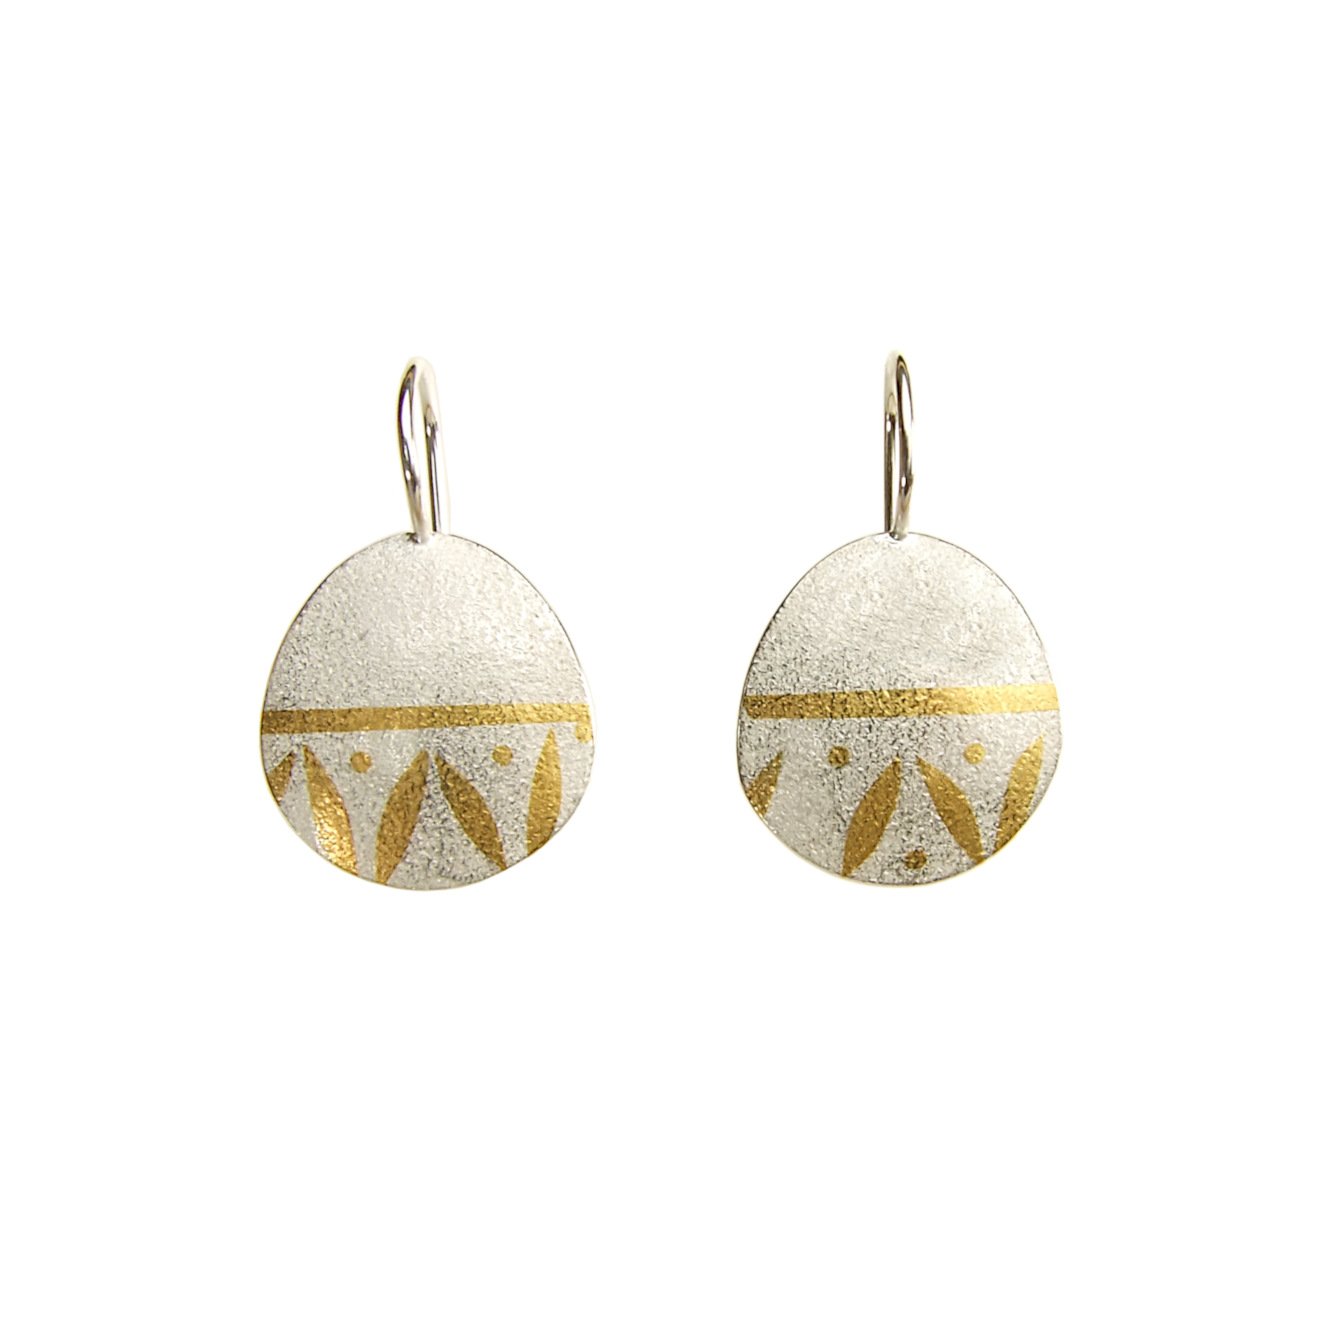
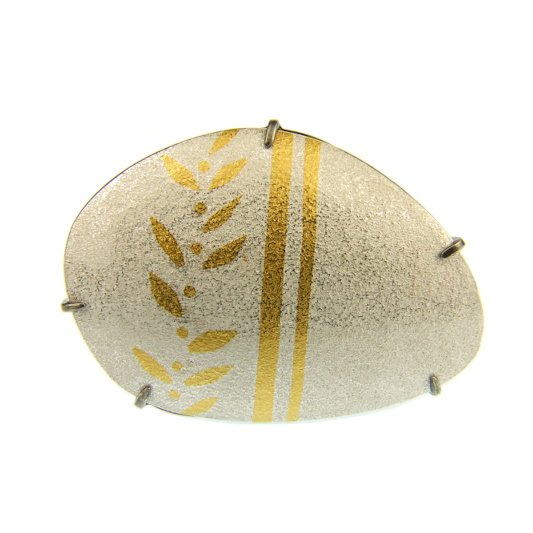
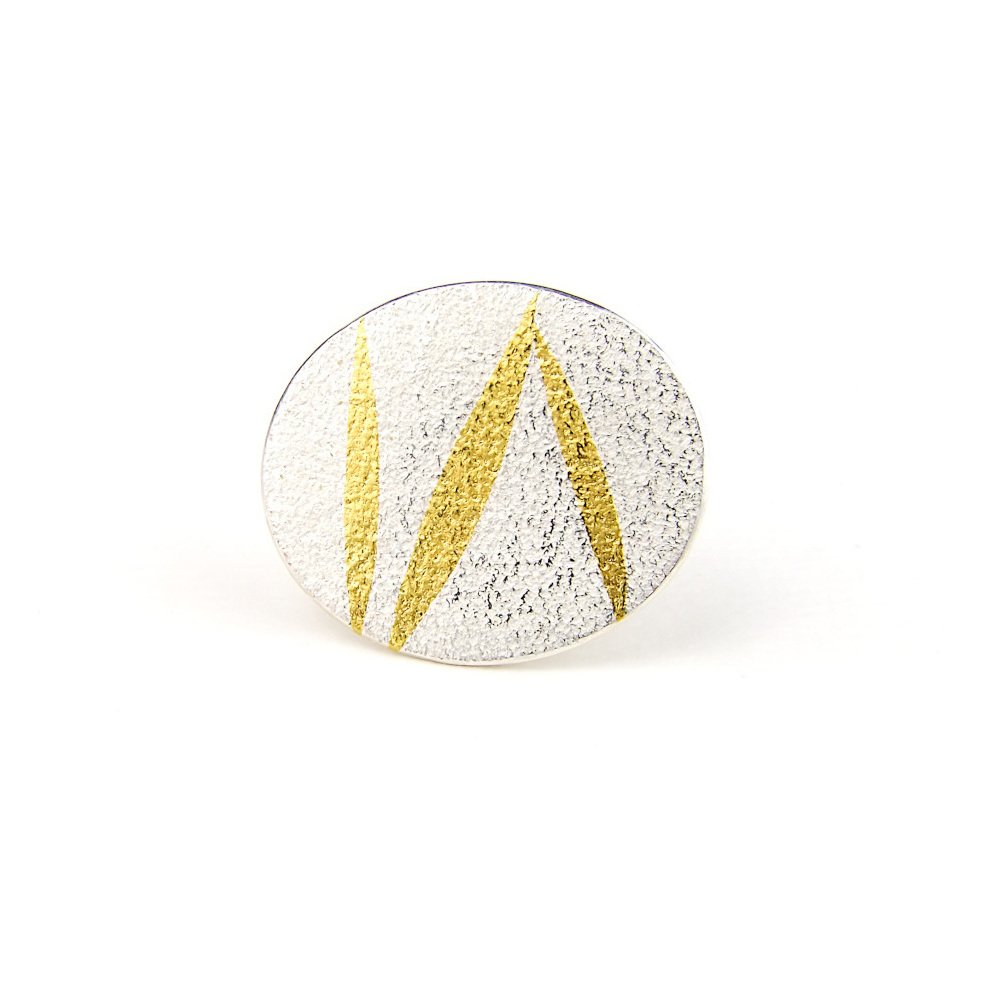
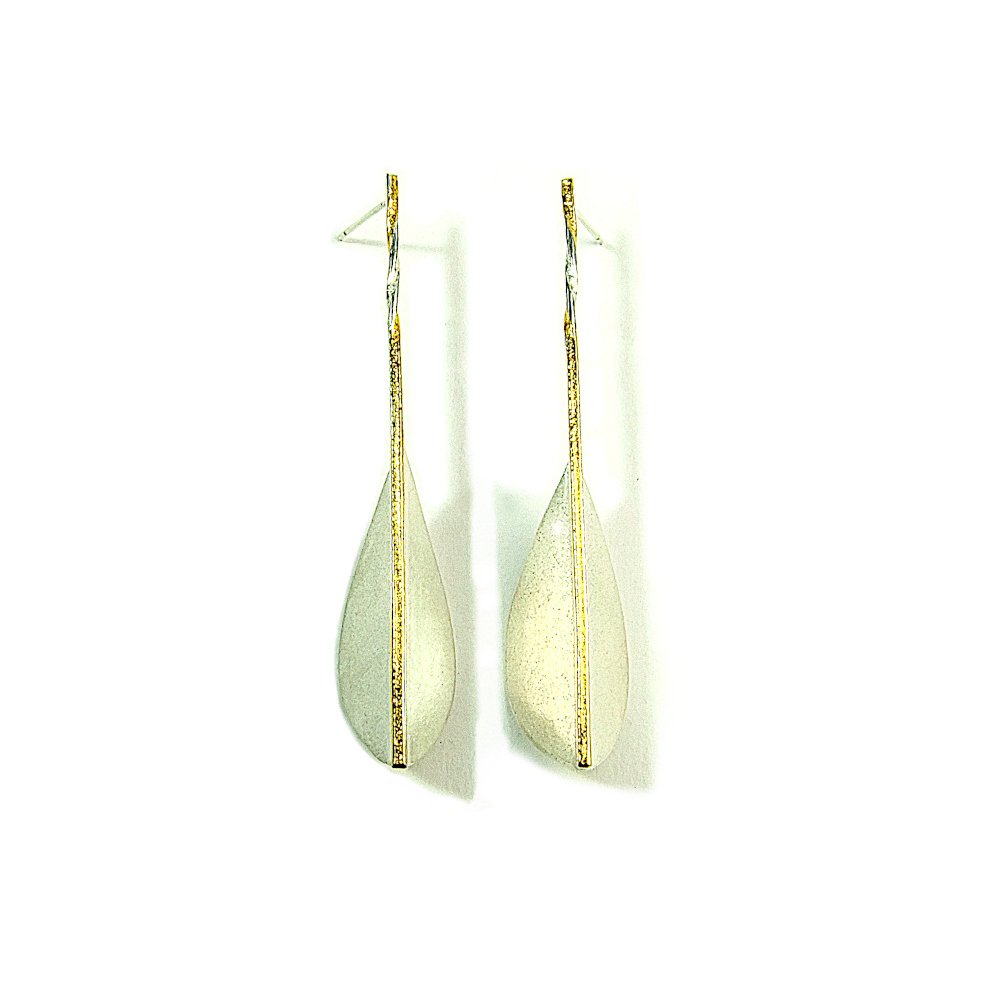
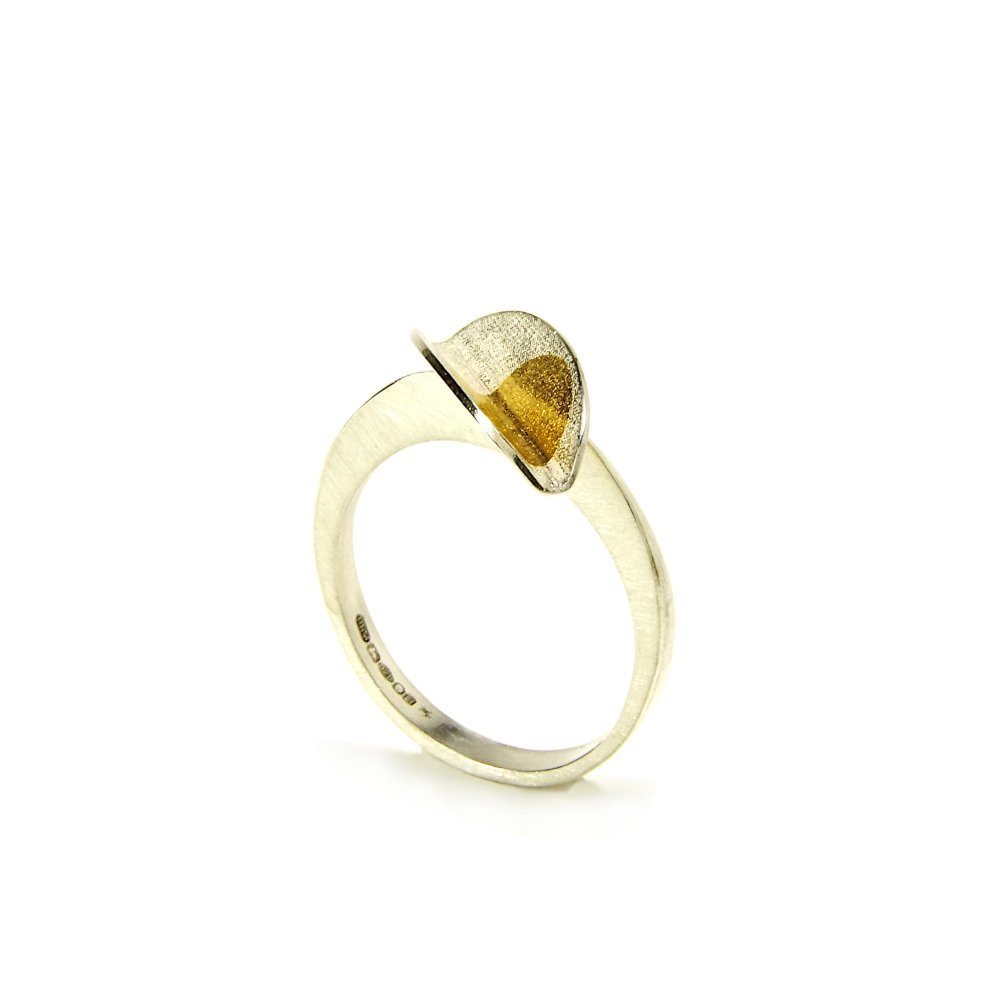
Below are various pieces from different collections that I have made using this technique.
Book classes
If you are interested in learning this technique do get in touch by email and I will let you know when the next course is planned. I usually teach this technique over a whole weekend at Rachel Jeffrey Jewellery in the beautiful village of Wheathampstead, Hertfordshire. During the course I will explain the technique in great detail and there will be plenty of time to make a number of pieces. I will also teach the additional technique of riveting that can be used in combination with Keum-boo.